The year is 580AD and I Aelfwald have designs on the Kingdom of Elmet. I have led my war band into the Kingdom and have gathered a herd of sheep that we found unattended near one of Elmet's rich settlements. Here is the plunder being driven before my brave warriors.
Aelfwald and his champion Eadwulf can be seen at the head of his band of determined raiders
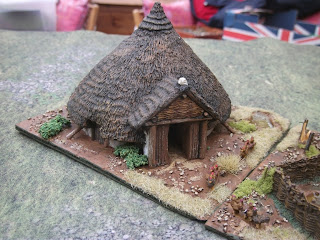
Here are a few pictures of Elmet. It should be noted that the figures being used are part of Terry's superb collection of 15mm Dark Age troops many of which are made by Splintered Light Miniatures. The buildings are also Terry's and come from a variety of manufacturers. The hills and trees are mine made by S&A Scenics. Here is a woodman's hut
A lonely hut near a swamp. Poor town planning rules in Elmet
Pigs are kept under close watch as my raiders may not all like lamb.
Another lonely hut
My raiders gain a march on the British commander Ieuan's pursuing forces.Given how successful everything had been so far it is surprising my force moral was not higher.
Dust can be seen in the distance as Ieuan's troops close on the raiders. Two units of Hearthguard move to block a possible attack.
The rest of the Saxons push on with the sheep!
The situation just before the Briton's arrive
Here come the Britons and they don't look happy.
Saxon skirmishers line the wooded hill in order to pepper the advancing Britons as they advance.
The Britons have two units of cavalry with them who are just behind the wood. Aelfwald and Eoppa turn two units of warriors to face them
The Britons have managed to get one unit behind most of the Saxon army and are closing on the sheep!
A mad dash by Aelfwald and Eadwulf crashes into the Briton's levy causing much harm
The remnants of the Levy and their leader Cynrain can be seen falling back in rout towards the swamp
One unit of the British cavalry charge the Saxon rear guard. The other has turned round to rejoin the rest of the Britons
Heavy losses for the Saxons but also for the Britons. The same is true in the centre
Final stage of the battle. The Britons did manage to recapture the sheep! The Saxon unit had almost made it to the end of the table but were overwhelmed. They were to far away from the rest of the army so no help from Aelfwald. In the final stages of the game the Saxon's took a heavy toll on the Britons and even managed to kill Cynrain who had been leading the cavalry units.To sum up. The raid in March 580 was a failure for the Saxons. However, Aelfward's war band only suffered moderate casualties and the Briton's were left with heavy casualties, especially among the levied units. Consequently Aedfwald raided a small church in May but was unopposed. Sadly it was a poor church and nothing of value was found. The next stage will be another raid in May 580.
Great game with Terry and a lot of fun. We are both up to date with the rules again and have learnt a lot about what not to do next time. The Saxon's were quite good at holding their ground and not being impulsive to begin with. Then I changed my mind and attacked at great cost so should have waited until my forces were in supportive positions. Terry's cavalry would have been devastating if they had acted together but would then have had to wait to recover after their charge. They look to be a force that could win a game but they only really have one chance to do it. Other thoughts were that I need to take more pictures as towards the final stages of the game I was too involved in what I was going to do so missed taking a few shots. I also need to take some pictures from the other side of the table to even up the narrative. Looking forward to part two when we can get together again.


No comments:
Post a Comment